
How to collage, keep your photos updated & EASILY hang photos straight!
Now that we have figured out exactly which photos you want to print, (If you missed it? Check that out HERE ) and printed some of them to be the same size as your old hanging photos, it’s time now to figure out how to properly display it all. I have had so many families tell me they love the photos but don’t know where to display them. They get anxious with the idea of placing them all in new frames, new locations (there are only so many walls) and don’t know what to do with their old photos or how to switch it up.
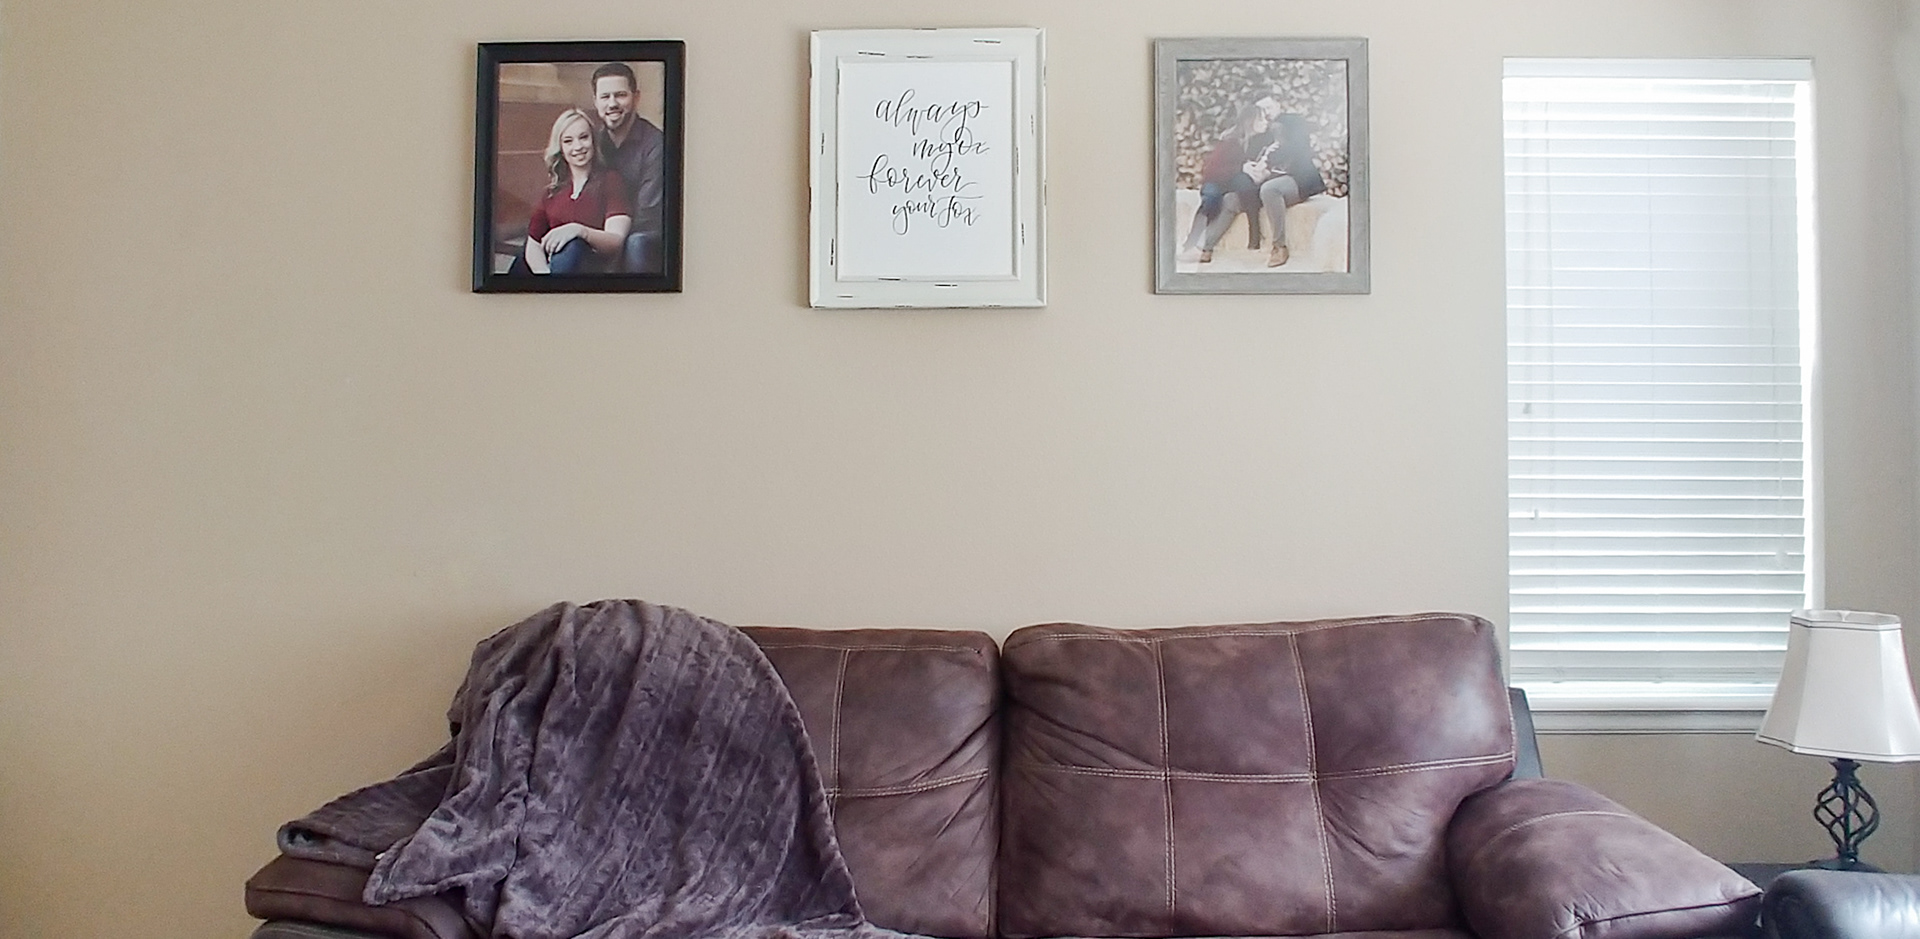
Take down the all frames that have photos you are replacing and slide the NEW photo right in its place. Don’t remove the old, just be sure to place it BEHIND the new one so it is out of sight. This not only allows you to keep a storage for all your old photos, it is a GREAT way to be able to go back and look at the last few years of photos for future reference and keep them safe! It ALSO saves $$$ Because 1. You don’t have to buy a whole new frame. 2. You can use that frame and even TURN it to get say from vertical to horizontal to get a new perspective and 3. What a great way to keep and store your older photos!
Once you have replaced them with the new, we now decide to switch it up! I know.. It’s REALLY HARD to do this step (creature of habit over here!). This is where the collaging comes into play!
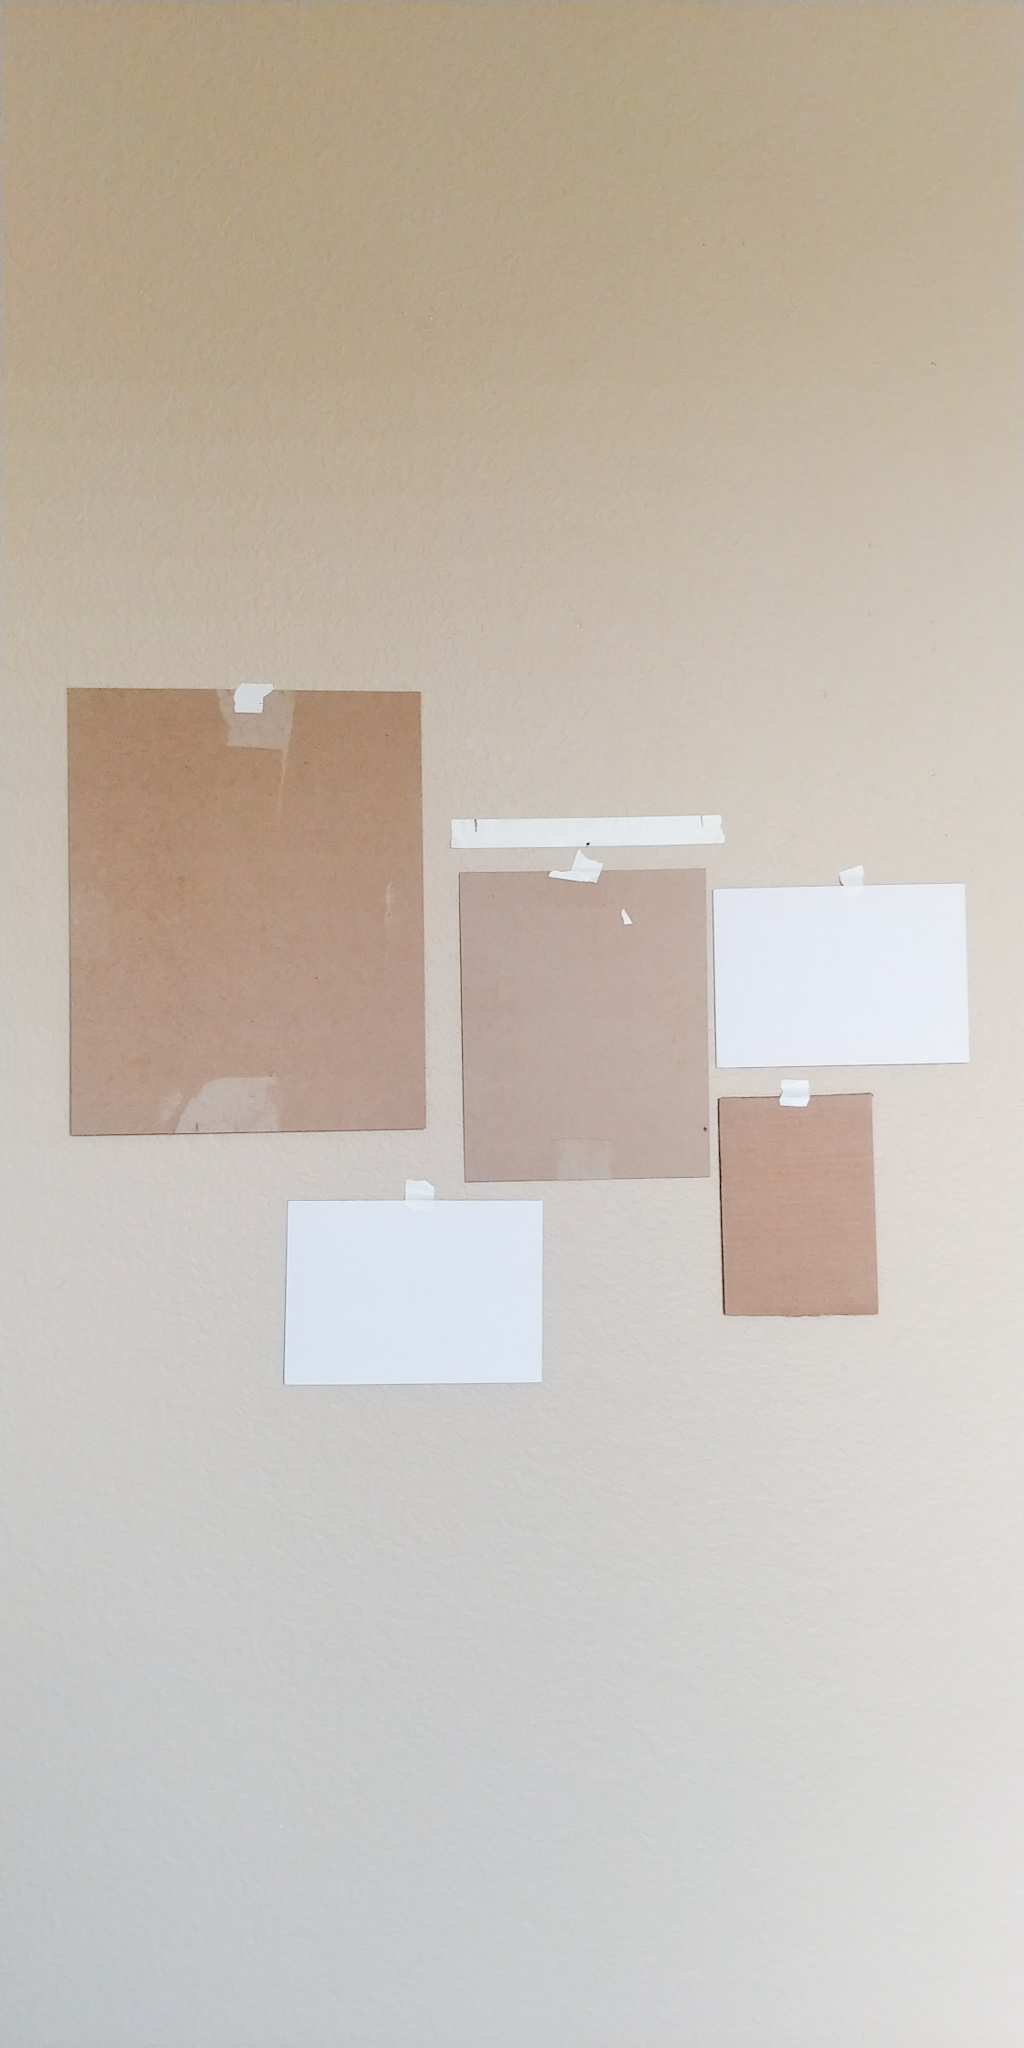
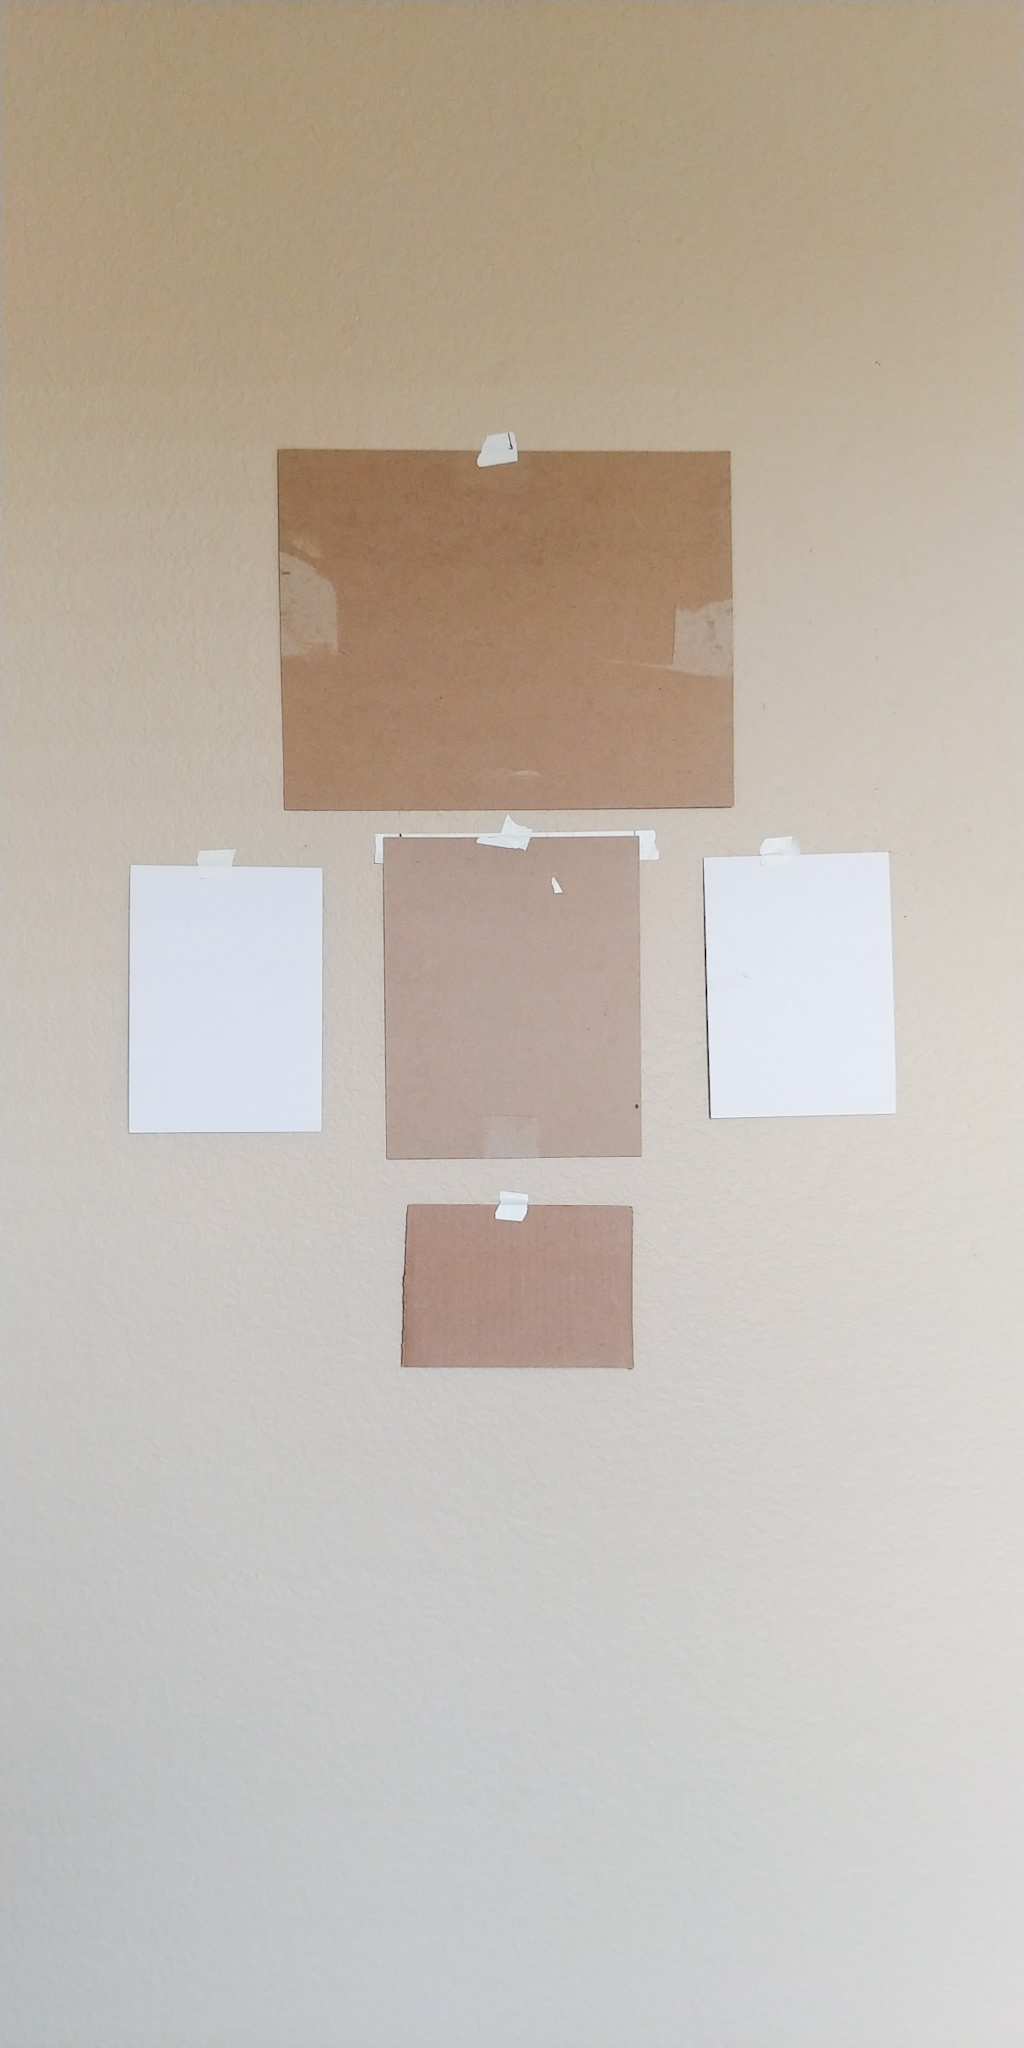
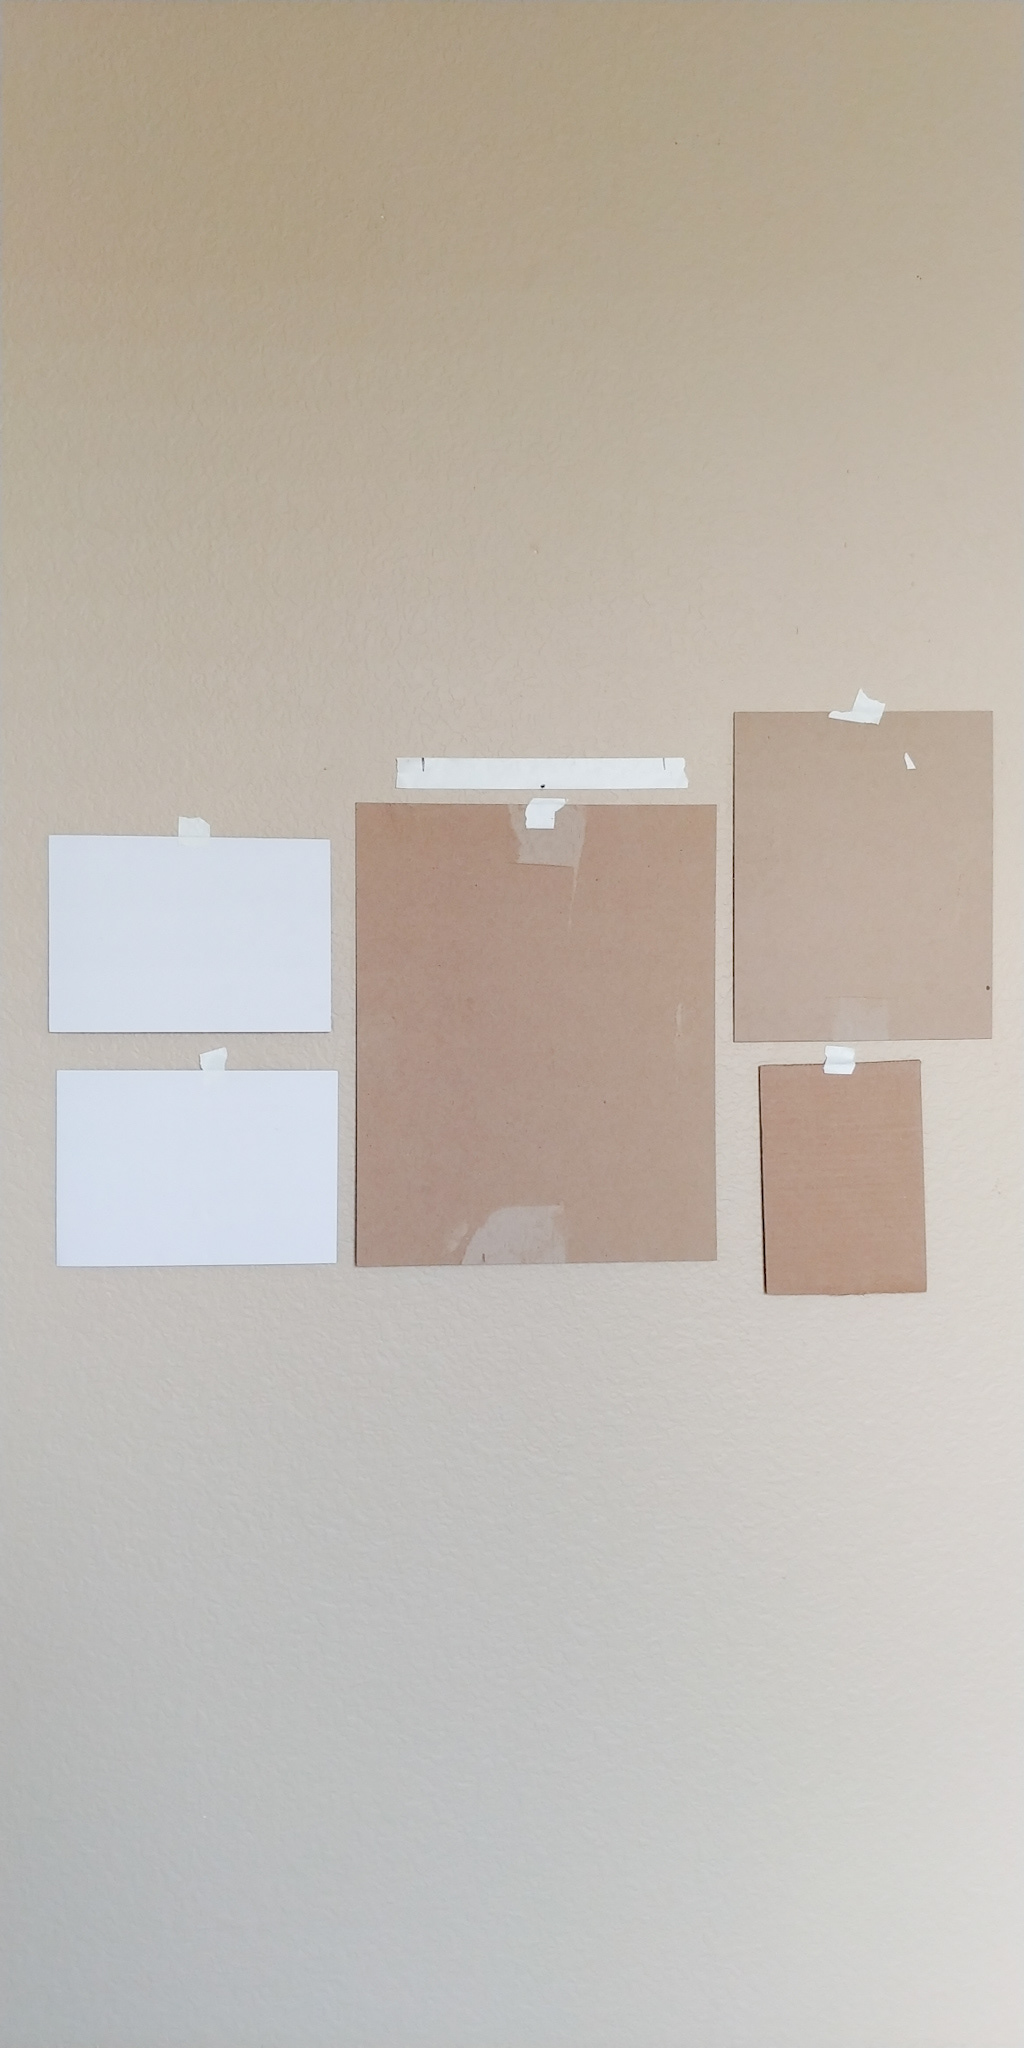

Cut pieces of paper into the exact sizes of all the photo frames you currently have on the wall. You can use printer paper, cardboard, large rolls of craft paper, whatever you have! I prefer taping together simple printer paper to get the exact size I need! Once you have done this… Now comes the hard part. Take down ALL your pieces currently on the wall. It may sting a bit, but trust me, were almost there.
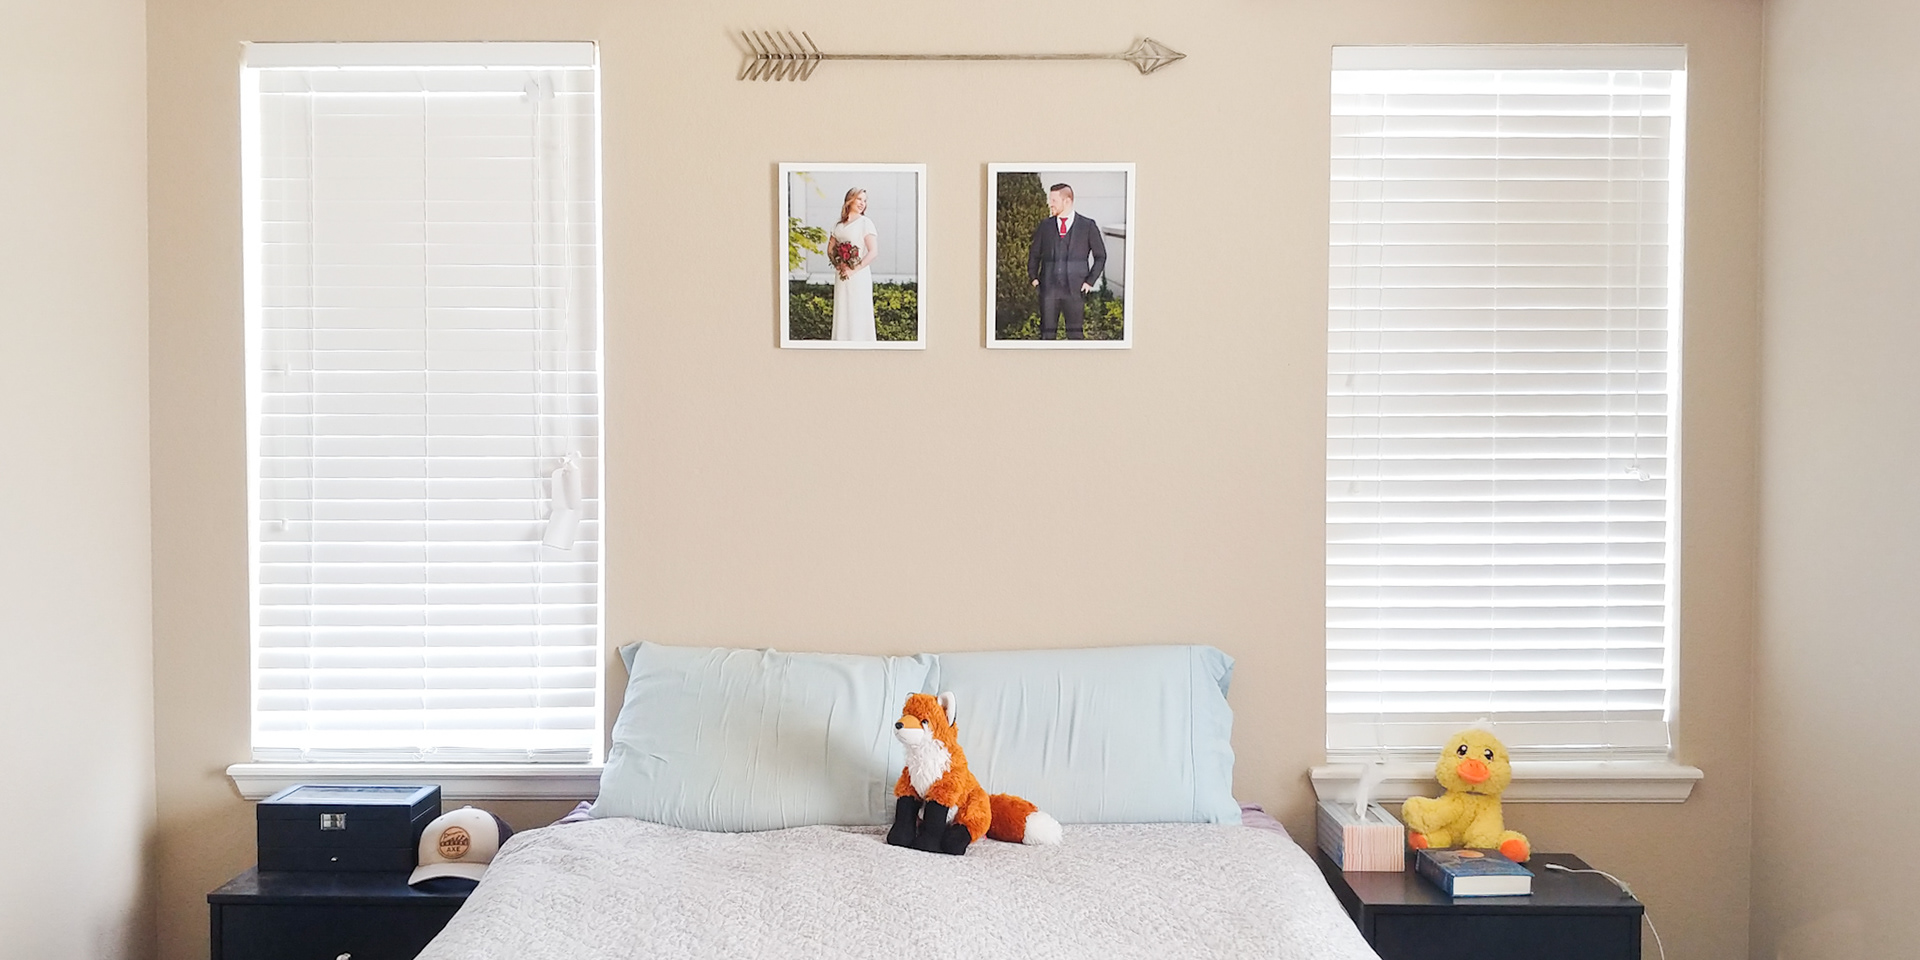
Feel free to leave the nails in the wall to use as reference in case you do want to use them again! Use artists tape (or painters tape) to hang the pieces of paper. Move em around! Get a feel for the different sizes and what looks good (SEE PHOTOS ABOVE). Add macrame, a small quote, some beautiful artwork or a new sign you’ve needed a place for! Move these things around until you are satisfied with the different placement and want to make it yours!
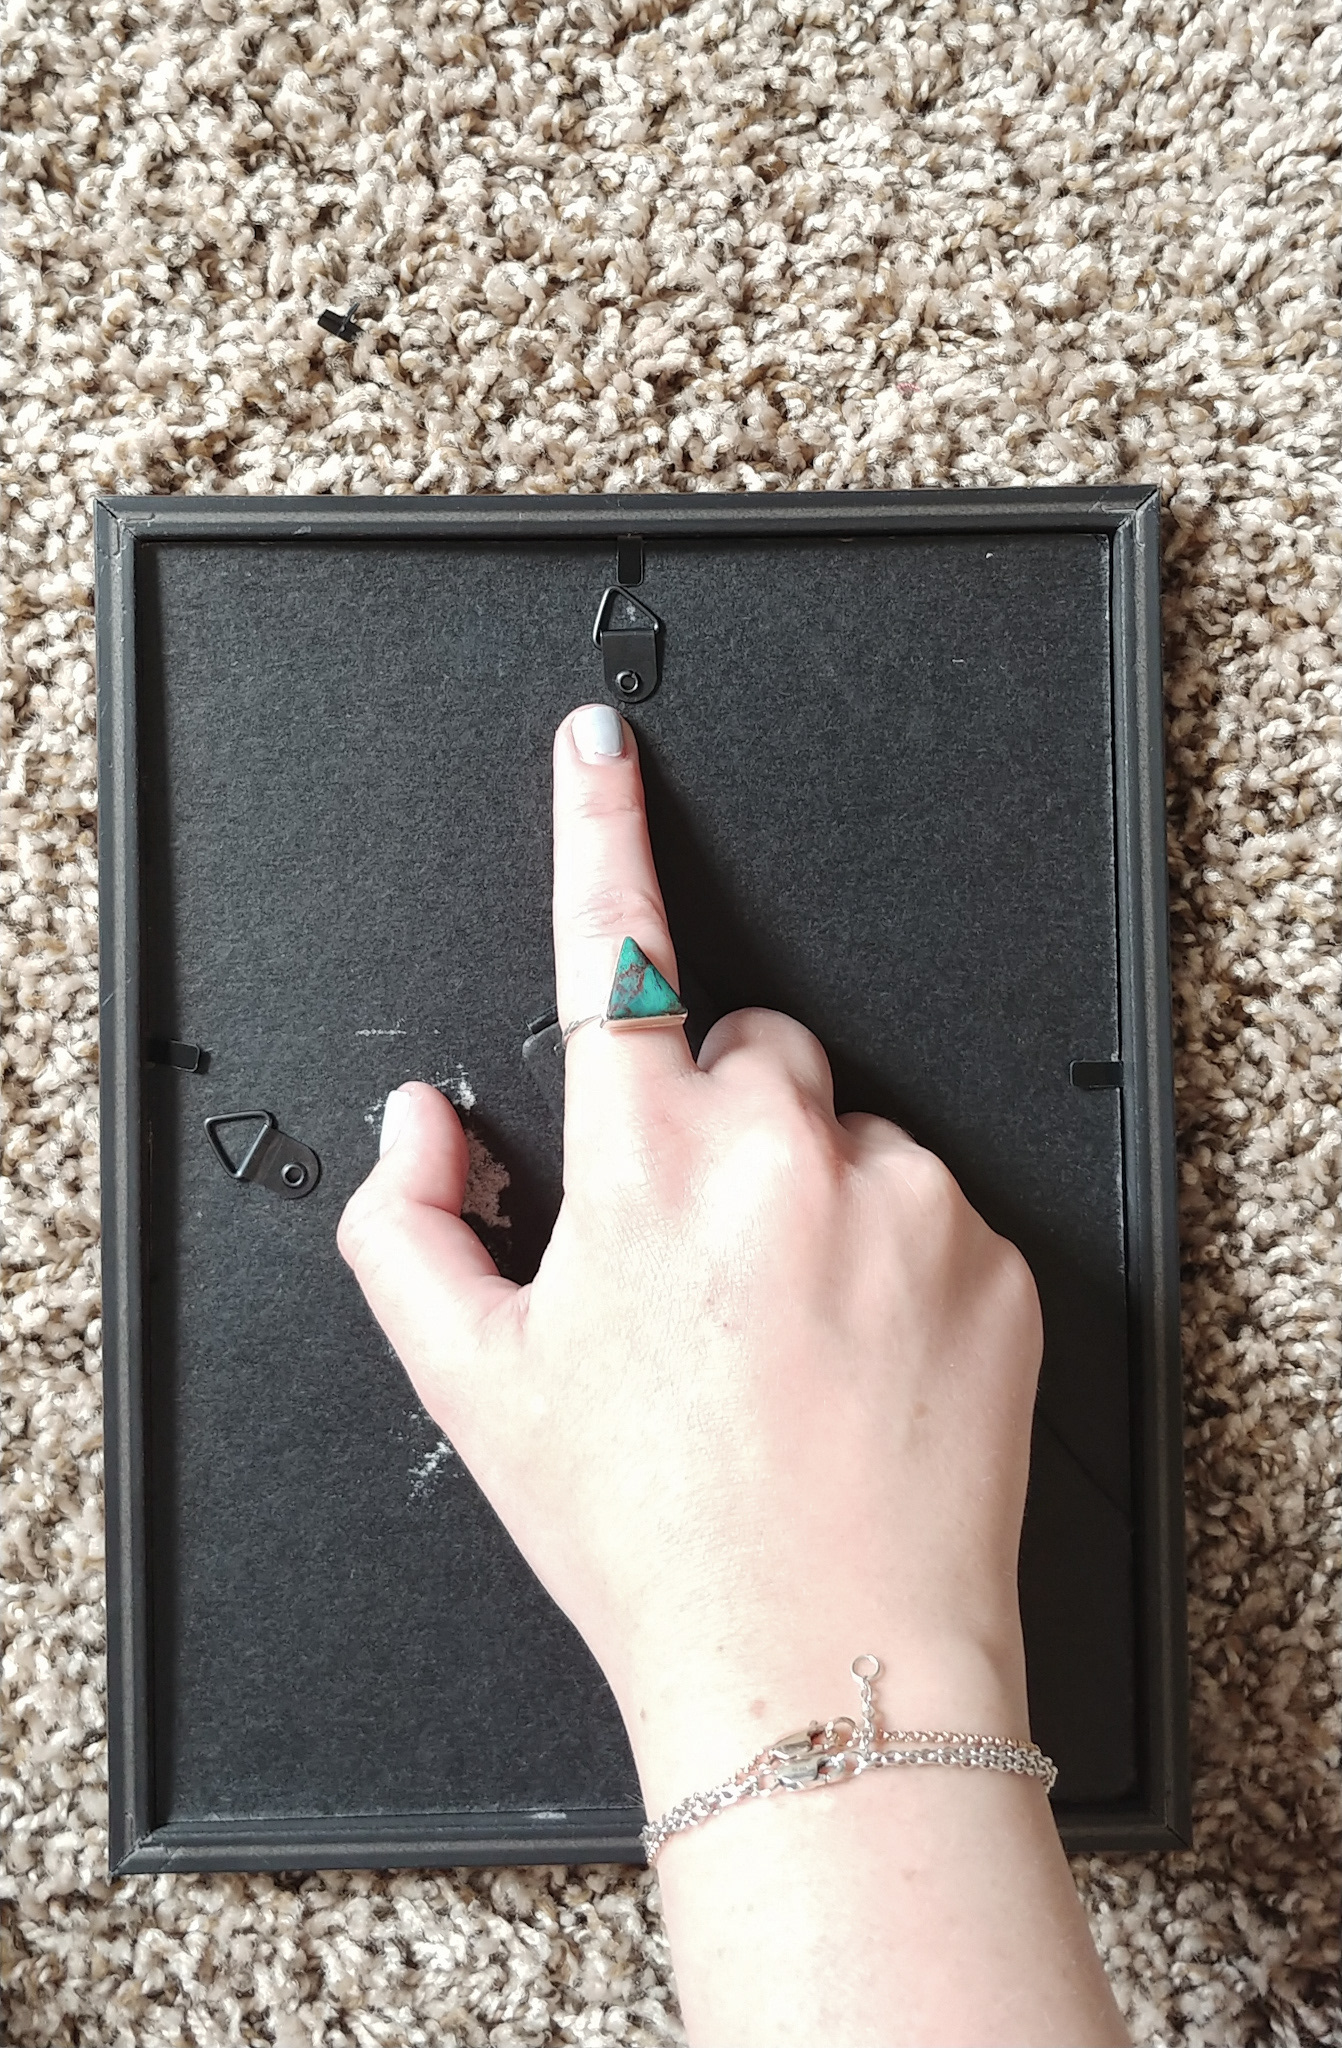
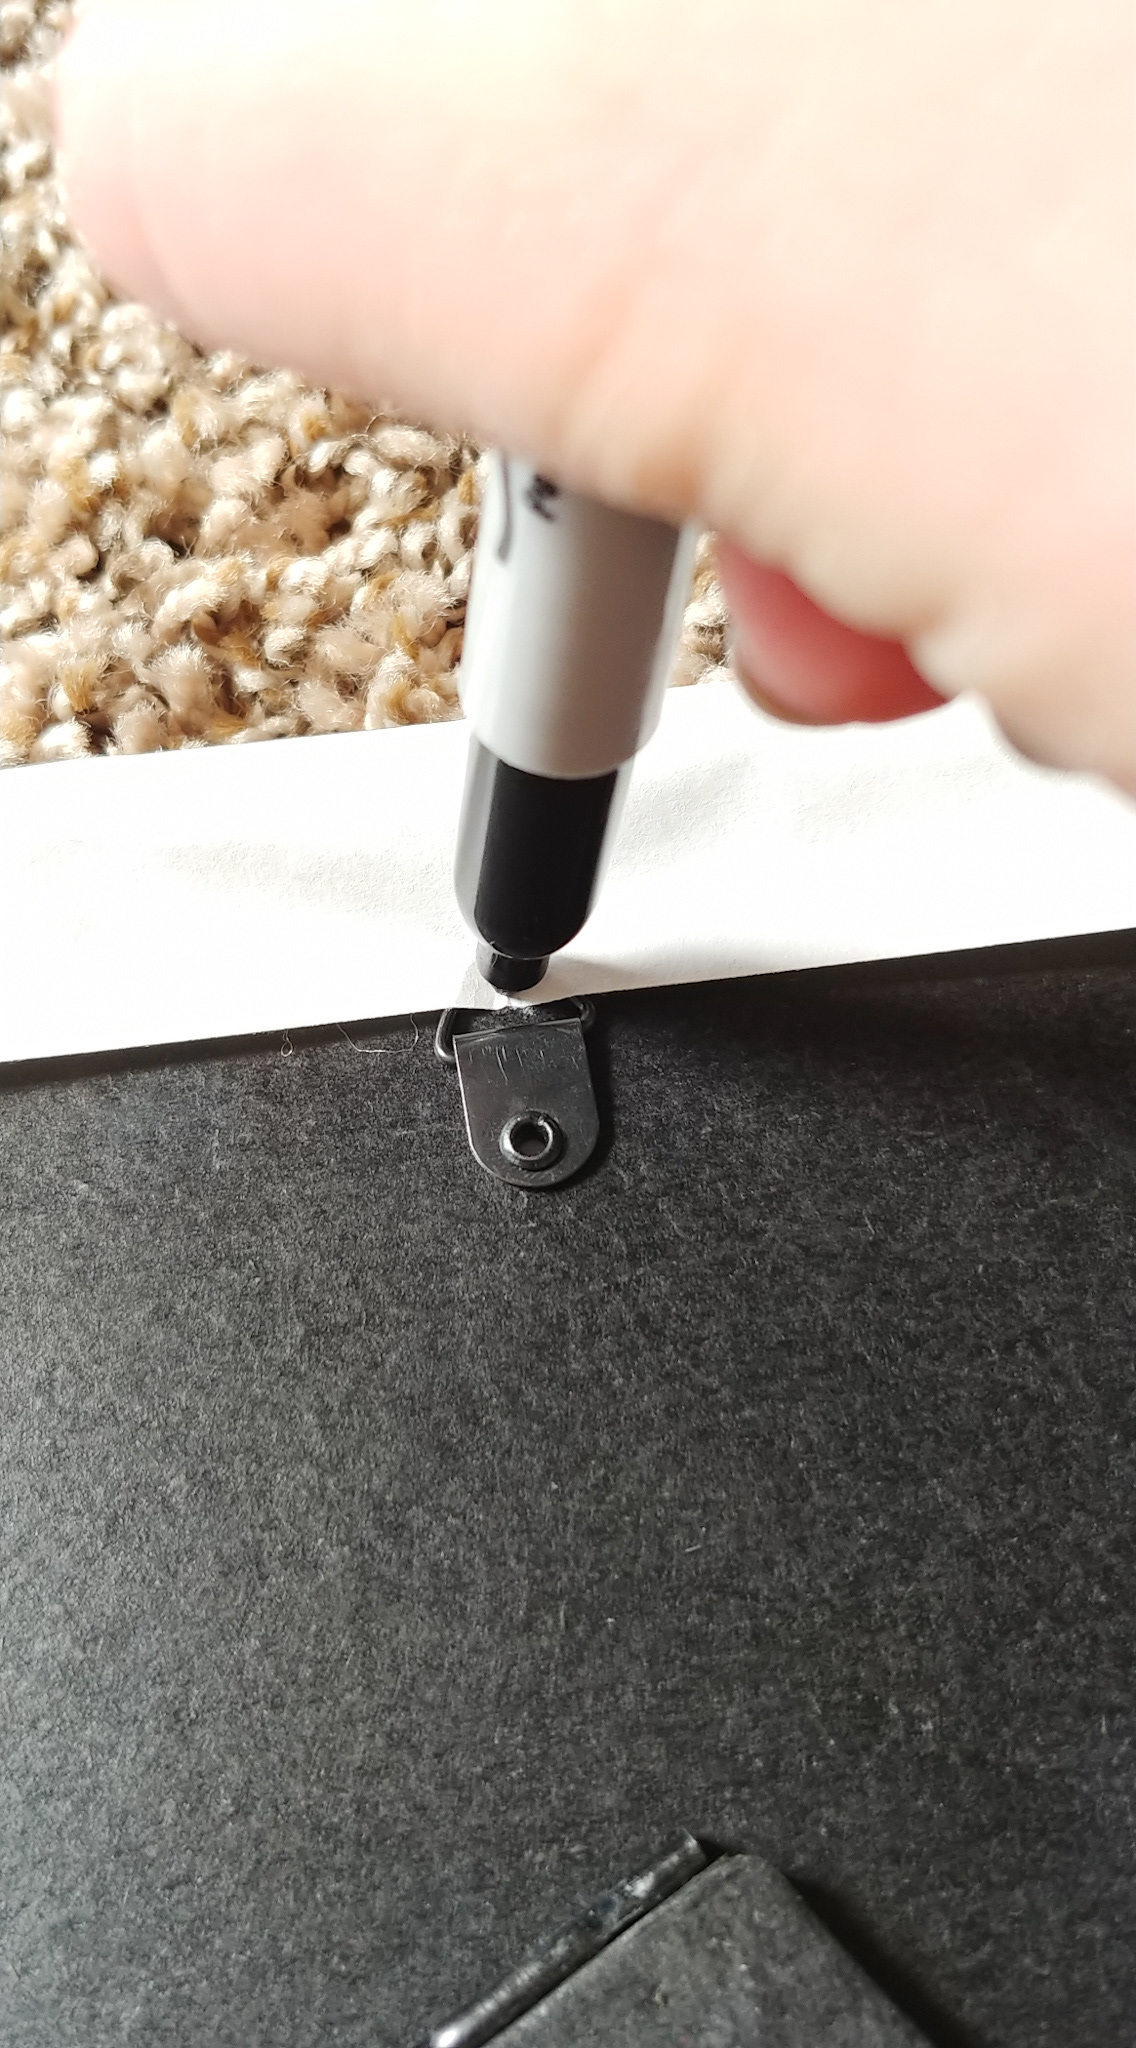
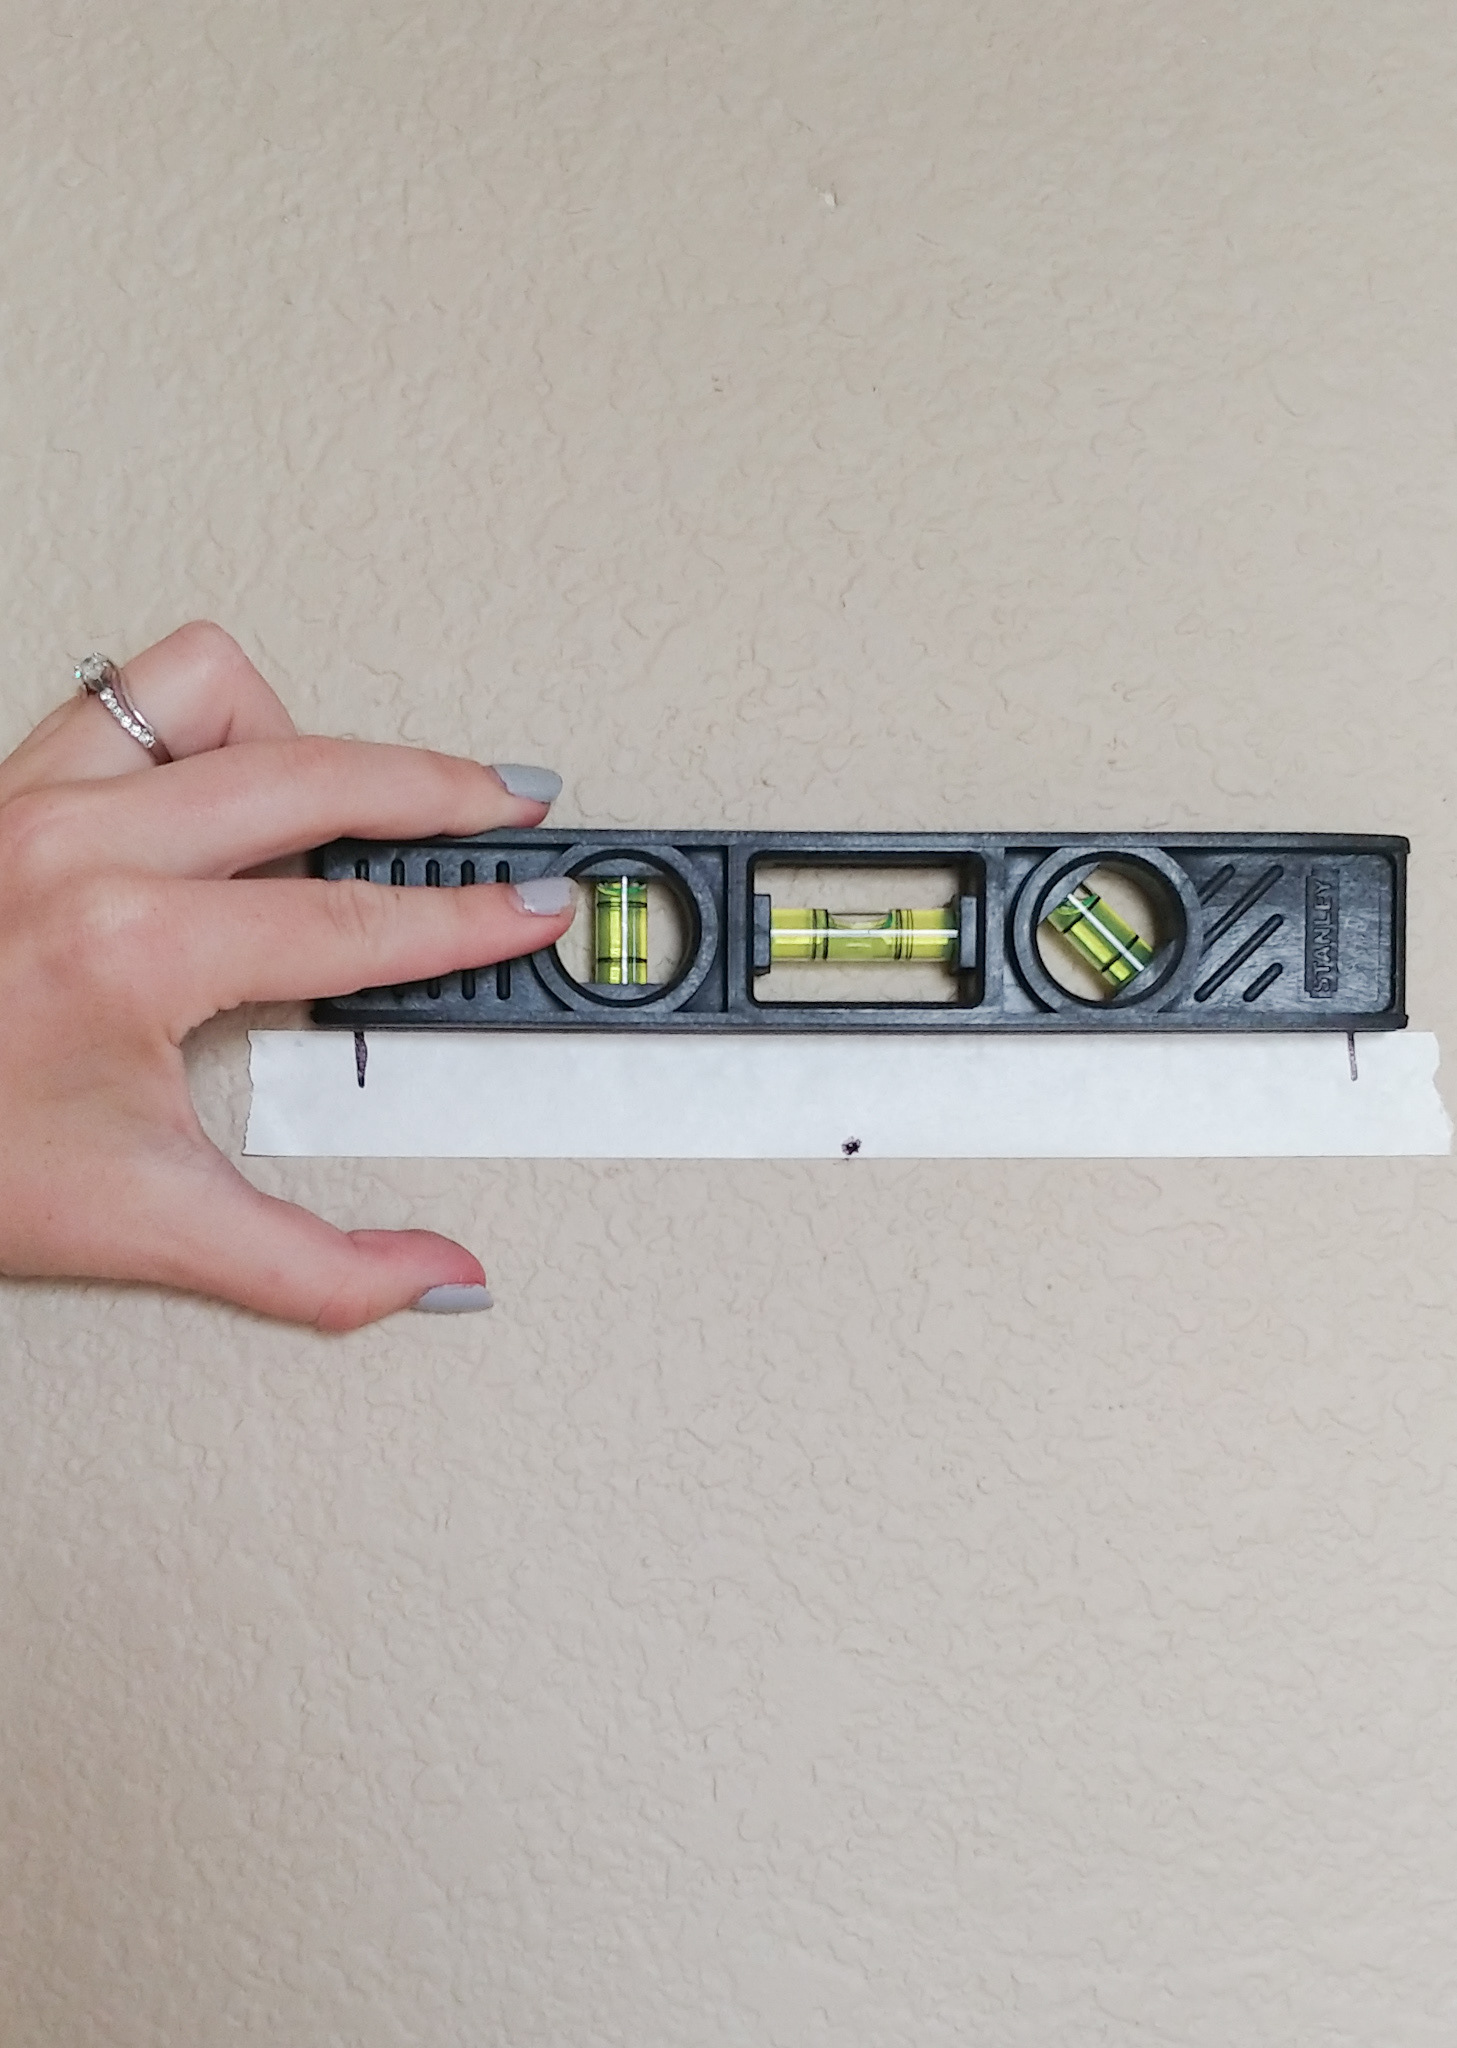
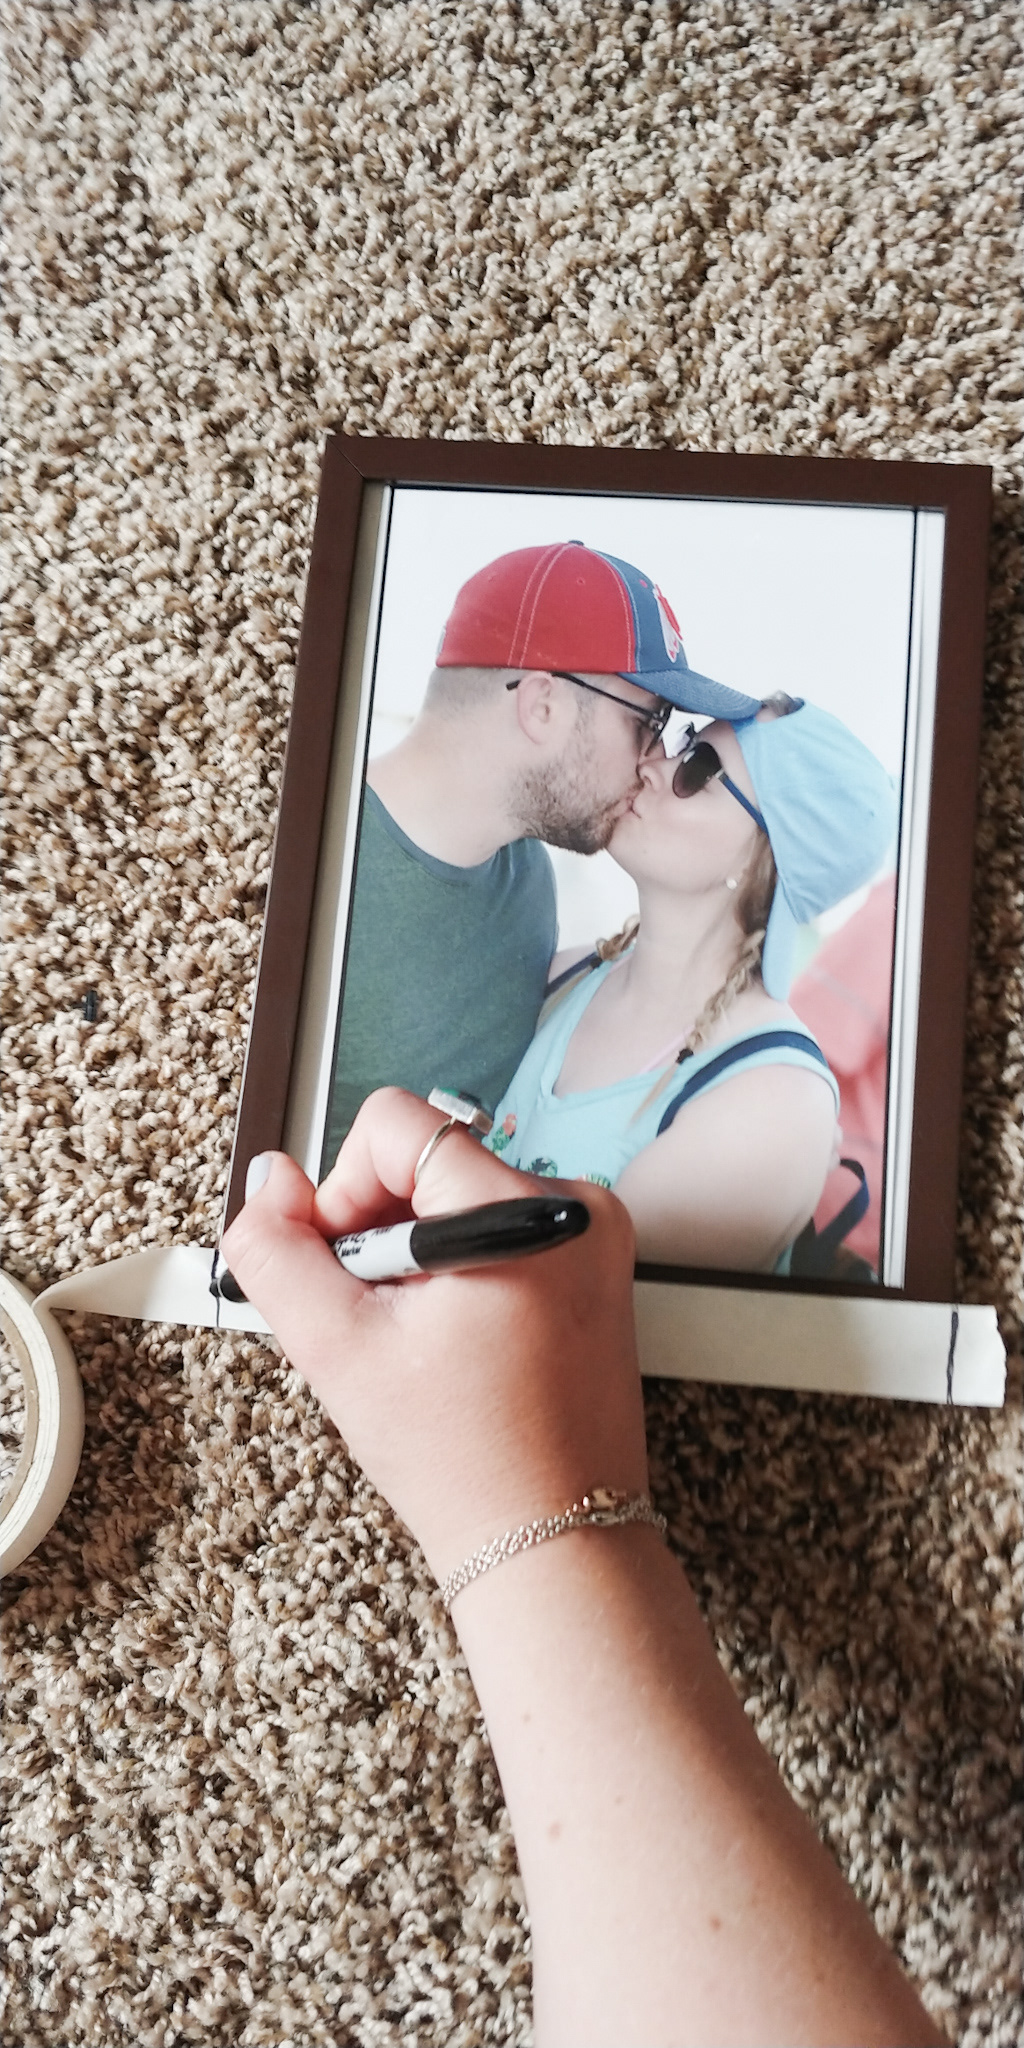
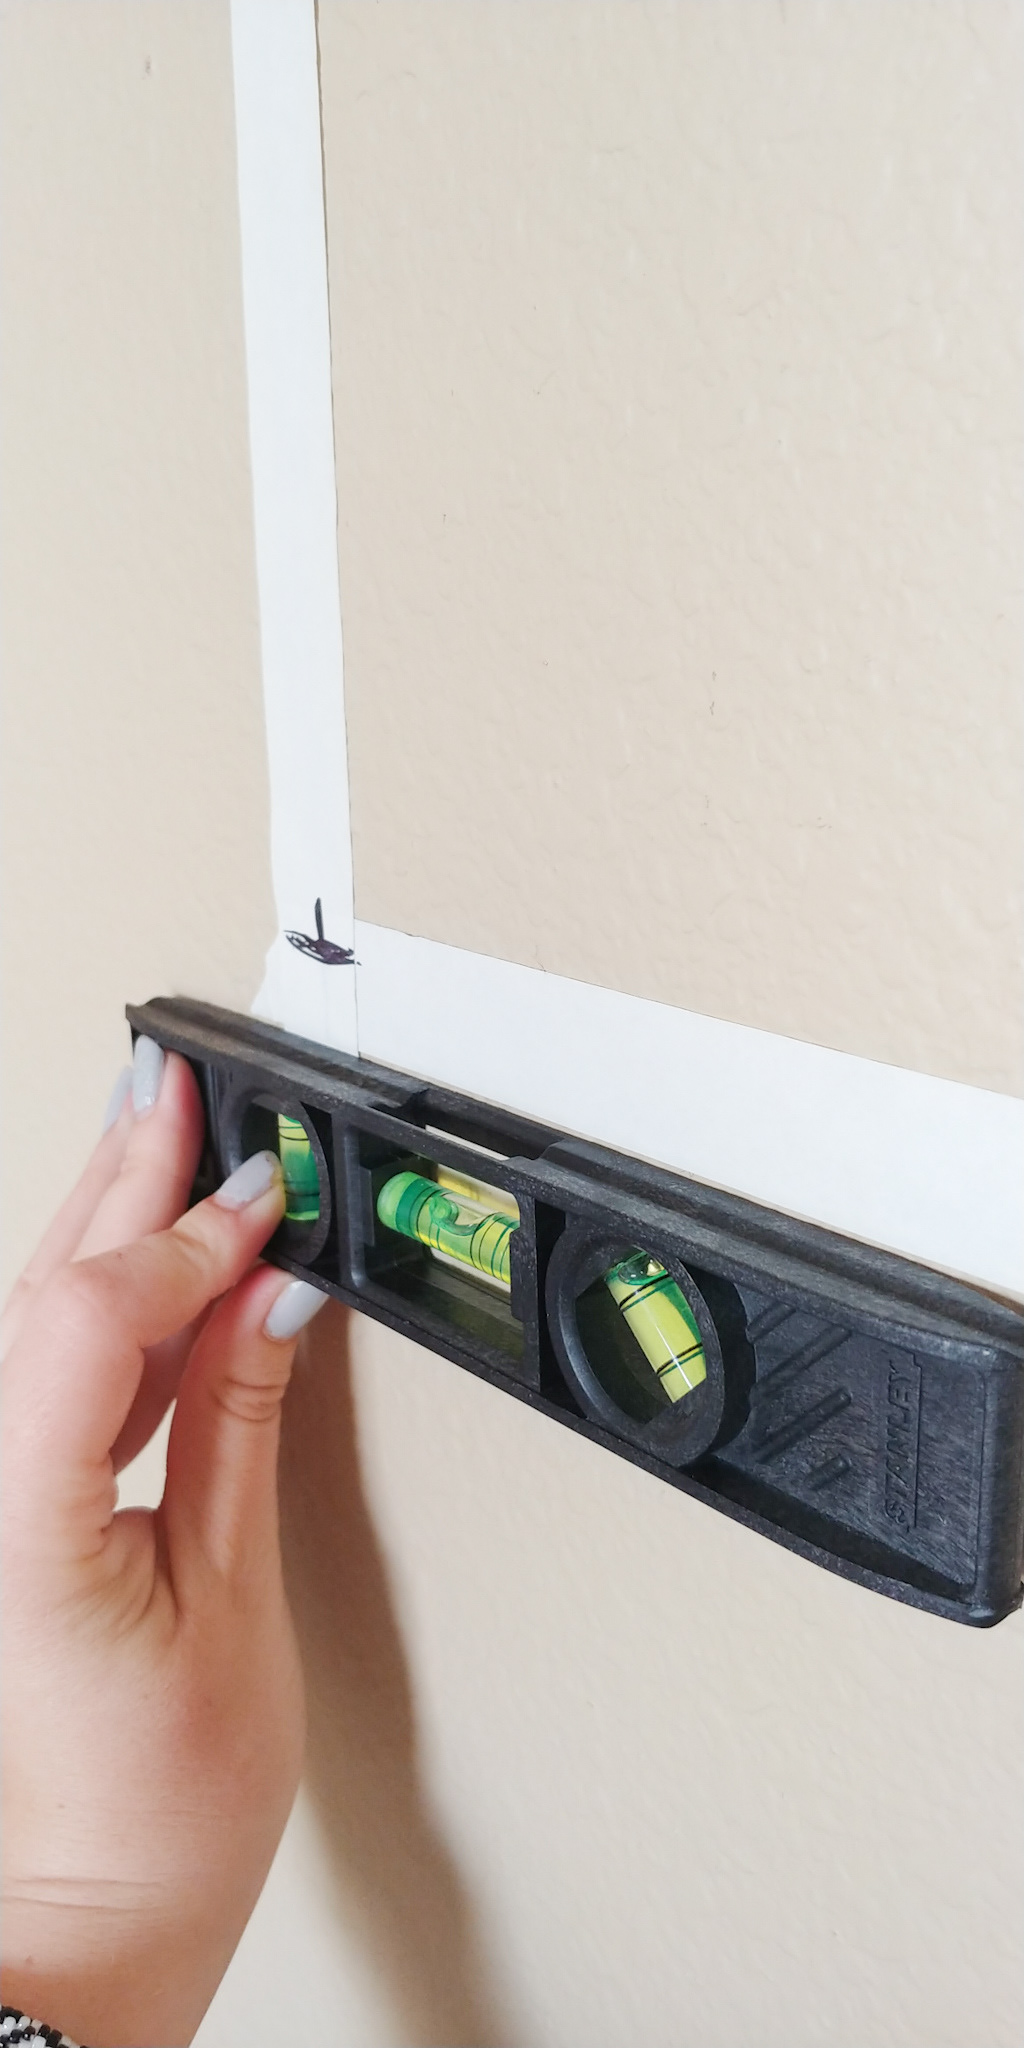
NOW we’ve got the collage settled and we need to re-hang everything, and ensure it is straight! The easiest most SIMPLE way to hang photos, is to place a piece of tape on the back of the frame, mark how wide the side of the frame with sharpie, and pinpoint exactly where you need the nail(s) to go. Poke a hole with the sharpie or make a dot. Place the tape on the wall overtop of your paper and use your leveler to get the piece of tape level on the wall. Once level, hammer in your nails directly into the marked holes, set your frame up on top of paper for a double check and BOOM! You move onto the next one! Remove frame, rip off paper and tape and rehang your frame!

If you use command strips (hey heyyy to all you fellow renters out there!) you can do this same process!
Use visible tape to measure out the length and width of the frame; this is your guide to place the frame straight. Use the measured tape and level it around your paper template you used to figure out exact placement; The framed tape should look like an L. This will be your guide to ensure your frame is level before you press onto any wall.
Stick the command strips together BEFORE you stick to the frame or wall. Detach the sticky side that goes to the frame & stick tight! Since we are now no longer needing the paper template for placement take that down but leave the framed tape. Remove wall side and prepare to stick to wall. Before you push the frame onto the wall, make sure that you can see the edge of your tape guide to ensure you are lining it up with the bottom and side. Once level PRESS HARD onto wall. Remove tape and Magnifique! Perfectly straight frame with the use of command strips.


Using the same frames and even switching up the layout of some from horizontal to vertical makes a huge difference in updating collages while saving tons of time and money.
The paper template method is a GREAT way to freely move around your pieces of your collage to ensure you get exactly what you are looking for!
The usage of tape to measure exactly where nail holes, hanging parts and wall hangar pieces are? SO easy! Instead of guessing where they might be, you are able to freely move, level and easily hang tons of pieces at once. This has saved me MANY a hole in the wall or not straight frames and I know it will help you too.